While actively using a Windows Guest VM running on an XCP-NG Hypervisor in UEFI mode, you likely will not have any issues with the mouse, but the issue where mouse functionality is suddenly lost until the next reboot seems to occur at either the moment the screen “blanks” after inactivity for a set period, or at the moment of “wake”. Either way, the loss of mouse functionality for the UEFI Windows Guest Virtual Machine is annoying at best, or potentially catastrophic at worst, should you have open documents that you need to save first, or you have other configurations to the system you need to first touch before resetting / rebooting the Virtual Machine.
While unfortunately we don’t know of any known “permanent fixes” for this issues (yet?), we do have a viable work around.
For the first step in our troubleshooting, let’s identify the confusing symptoms and indicators that reveal a loss of control to the Windows OS Guest.
Scenario 1: RDP or VNC Connection is Made to the UEFI Windows Guest VM
You may be able to RDP or VNC into the Windows Guest VM properly, but once you are logged in and at the Windows Desktop, you quickly realize there is no mouse movement. But what happens when you press Ctrl+Alt+Del (or Ctrl+Alt+End with RDP)?
If the triple key press combo “wakes up” the Windows VM and provides the list of options associated with Ctrl+Alt+Del, then there is a way to regain mouse function without rebooting first, but it takes some tricky keyboard work first:
You can either use the keyboard arrow or Tab/Tab+Shift keys to “cycle” through the options showing after a Ctrl+Alt+Del. You can also use the Esc(ape) key to exit from the Ctrl+Alt+Del menu (or select the “Cancel” button, at the bottom and hit Enter).
To start the fix/workaround to get the mouse function back, try using the “WindowsKey” to open the Start Menu and then typing in ‘devmgmt.msc’ – which often results in Windows showing you the suggestion of “Device Manager”. When the “suggestion” for Device Manager appears, you can then press the “Enter” key, and from here to access Device Manager.
You might also use “WindowsKey+R” to open the Run… Prompt and typing in ‘devmgmt.msc’ there:
t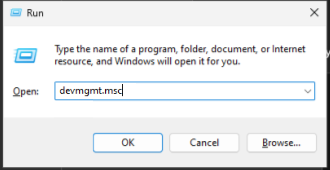
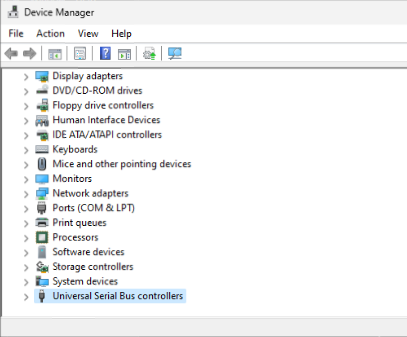
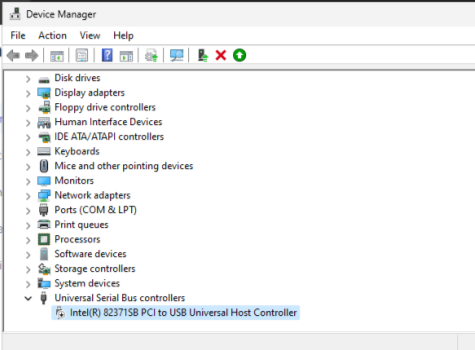
Once you have the Device Manager window open and selected,
Try pressing the Tab key and you should then see the top-most option. which will be the “Hostname” or “Windows Computer Name” of the UEFI Windows Guest VM, in the Device Manager Window “highlighted in light blue” (Your systems default or custom color schemes may vary).
Now, use the “Down Arrow” key to highlight “Universal Serial Bus controllers” (Typically showing at the very bottom).
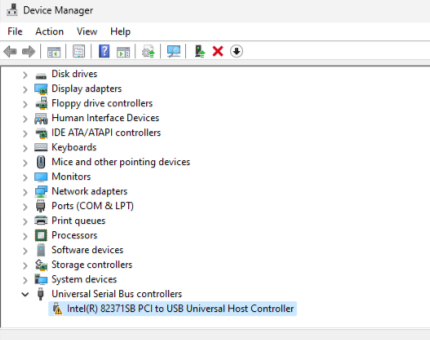
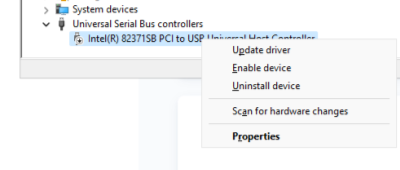
Once the “Universal Serial Bus controller” option is selected, try using the “Right Arrow” key to display all of the options available under the heading. You will most likely see a “Yellow Bang” next to “Intel(R) 82371SB PCI to USB Universal Host Controller”.
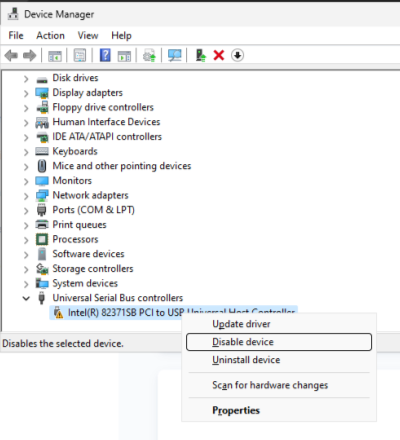
You will want to use the “down arrow” key to navigate onto the “Marked” item and use the “Menu Key” to mimic a “right-click”, which you will then see the option “Disable device” – use will again need to use the down arrow key to navigate to the “Disable device” option. Once it is selected, press Enter.
You should then see a prompt window with the heading/title bar as “Intel(R) 82371SB PCI to USB Universal Host Controller” and the Yellow Bang next to the text “Disabling this device will cause it to stop functioning. Do you really want to disable it?”, and be provided with the “Yes” or “No” Button options.
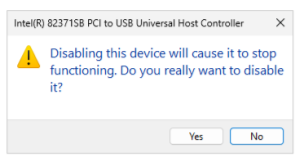
Notice that the “No” option is selected/highlighted by default (You can see the blue trace and/or dotted line around the selected Button) – you can press the “Left Arrow” Key to highlight the “Yes” button, and then press the Enter Key
At this point, you have disabled the non-functional USB Controller in the Windows Guest VM and the “Yellow Bang” is no longer showing. So now we can proceed with the workaround to enable the device in Device Manager and restore the mouse function.
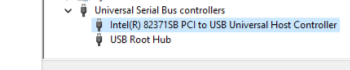
Use the “Menu” key on the keyboard again, with the “Intel(R) 82371SB PCI to USB Universal Host Controller” device selected/highlighted, but this time choose “Enable device”, and hit Enter.
You should now see that a “USB Root Hub” device has appeared in the Device Manager, and have restored mouse functionality
Scenario 2: XCP-ng Center / XenCenter Shows Only a “Black Blank Screen” Under Console Tab
If you are using XCP-ng Center / XenCenter and there is only a “black blank screen” in the console tab for a Running (green circle with an arrow/play button) Virtual Machine.
Click inside the blank/black area and try using the “WindowsKey” button on the keyboard to “wake up” the system. You may be prompted for a password, which you may not get any keyboard input for – so try using the Tab key in between other key presses until you see some kind of keyboard input into the password field and enter your password as needed.
Once logged in, follow the same steps as above from “Scenario 1” to get to Device Manager, and disable/re-enable the USB Universal Host Controller, until mouse functionality is restored.
Why This is a “Workaround” and Not Considered as a “Fix”
In our observations, we see that this “lost mouse” issue happens in XCP-NG when using XCP-ng Center or VNC remote access tools to a Windows Guest VM configured for UEFI boot. This occurs with both Windows 10 and Windows 11, and “somewhat frequently, but not always”. Since this issue re-occurs and this “workaround fix” will likely need to be repeated to regain mouse function in the Windows Guest, we consider this a “workaround”, rather than a “fix”.
Yes, we agree. This is very annoying..,
It is still unclear as to what the root causes of this problem are, but we are currently testing the removal and/or disabling of the “PS/2 Compatible Mouse” in Device Manager Under “Mice and other pointing devices” (Since the “HID-complaint mouse” is what XCP-NG is using as its mouse/pointer in the UEFI Windows Guest VM).
Should we come to a conclusion for a “permanent fix” for this issue, we will update this post and report back our findings.
We hope this helps others!